
LiveHQ documentation
From install to a live app.
Follow the setup guide, deploy your first project, then manage apps, databases, and access from LiveHQ.
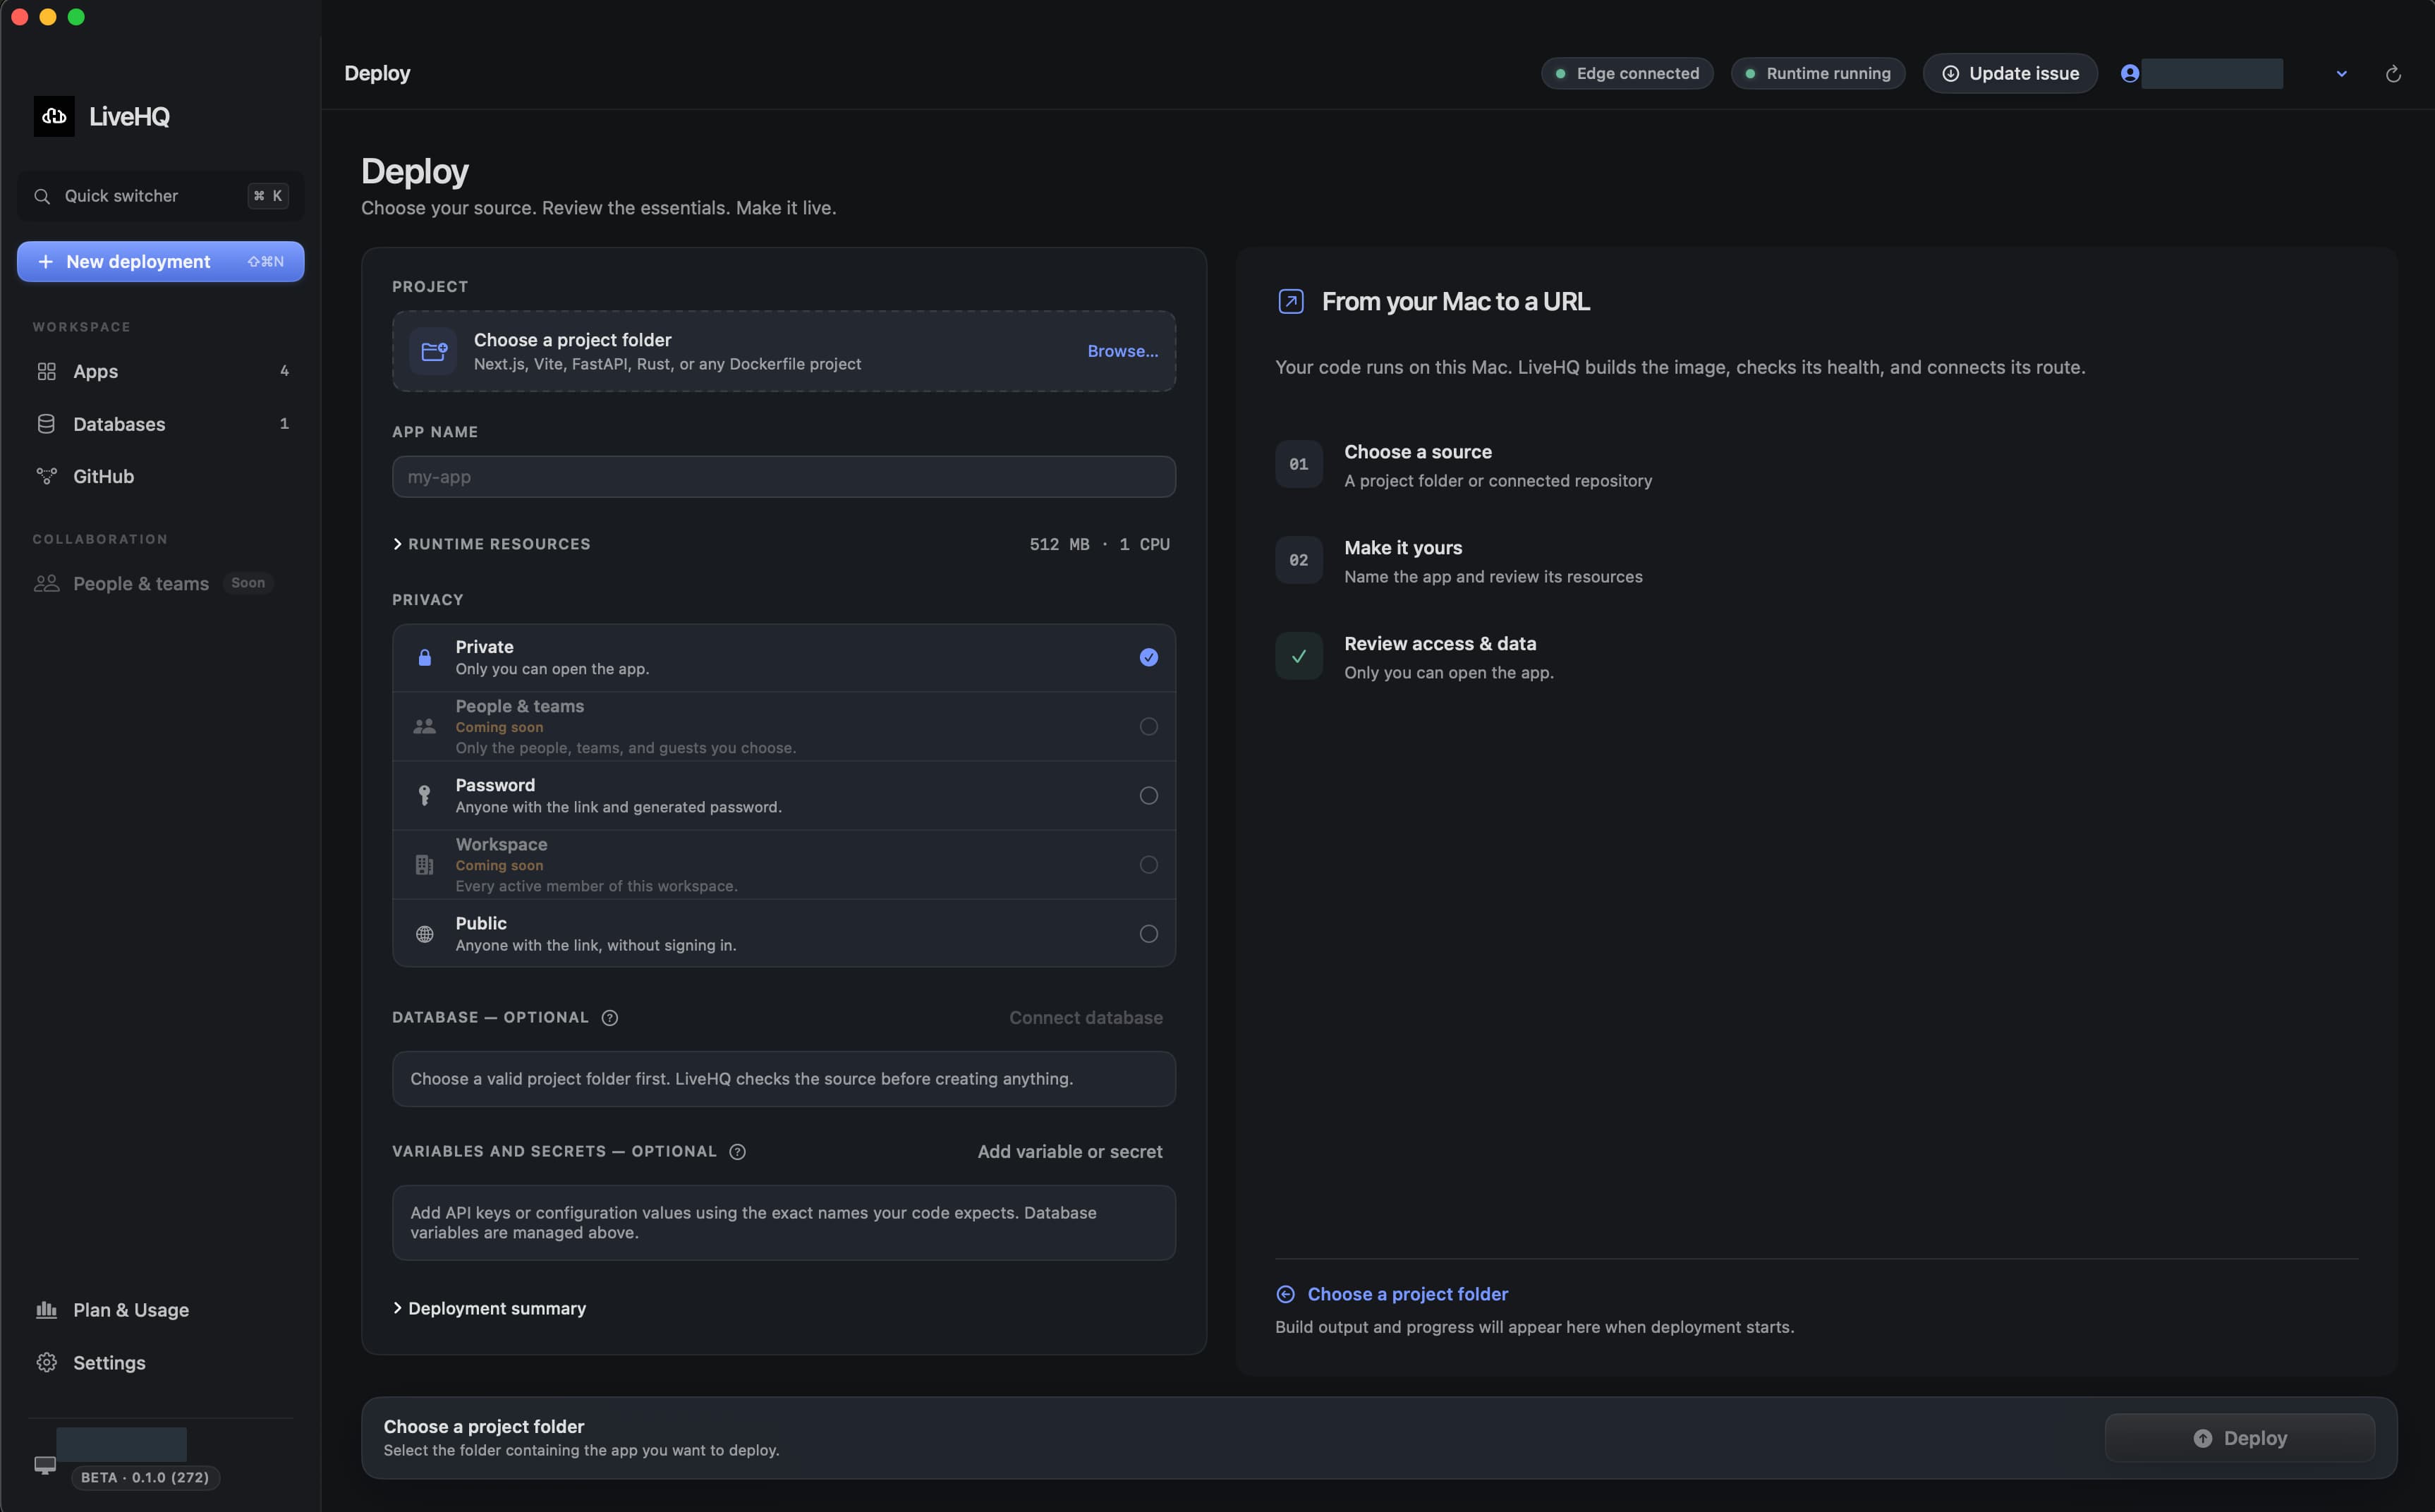
Choose a detail to zoom in, or enlarge the full screenshot.
Your first deployment
Set up. Deploy. Share.
Follow the stages in the app. A project gets its URL after the build, runtime, and health checks pass.
Install
Download the signed app and drag it into Applications.
Prepare
Start Docker Desktop and complete Prepare Mac in LiveHQ.
Deploy
Choose a project and review its resources, database, and access.
Share
Wait for Live, then copy the URL and choose who can open it.
Manage
Check app status, read logs, manage data, and deploy updates.
All guides
Find your next step.
Choose a guide for the task you want to complete. Each one explains what to do, how to confirm it worked, and what to try if it didn’t.
Operate
- Install secure LiveHQ updatesCheck for signed updates, understand installation status, and find the next step when an update is unavailable.5 min
- Deploy with the CLI or a coding agentDeploy and manage apps from the command line, read structured results, and give a coding agent the supported deployment instructions.10 min
- Diagnose common problemsResolve common setup, deployment, and connection problems using LiveHQ’s status messages and diagnostics.8 min
How LiveHQ works
Local apps. Managed access.
The Mac app and CLI send your requests to a signed runtime agent. That agent runs apps and databases through Docker Desktop and connects outward to LiveHQ’s public edge.
- 01LiveHQ app or signed CLI
- 02Signed LiveHQ runtime agent
- 03Docker Desktop and local databases
- 04Outbound OriginLink tunnel
- 05An HTTPS URL for your app